Instructions & Training
Winterization how to
Winterizing your Chicken Fountain is simple. Use 1” pipe insulation, an immersion heater, a heated hose and some zip ties to keep water flowing even in freezing temperatures. This setup helps prevent ice, reduce daily maintenance, and keep your flock hydrated and comfortable all winter long.
Have questions or need specifics for your geographic region? Email us—we’re happy to help you get set up for winter success.
Written Assembly & Installation Instructions
-

Prep the arms
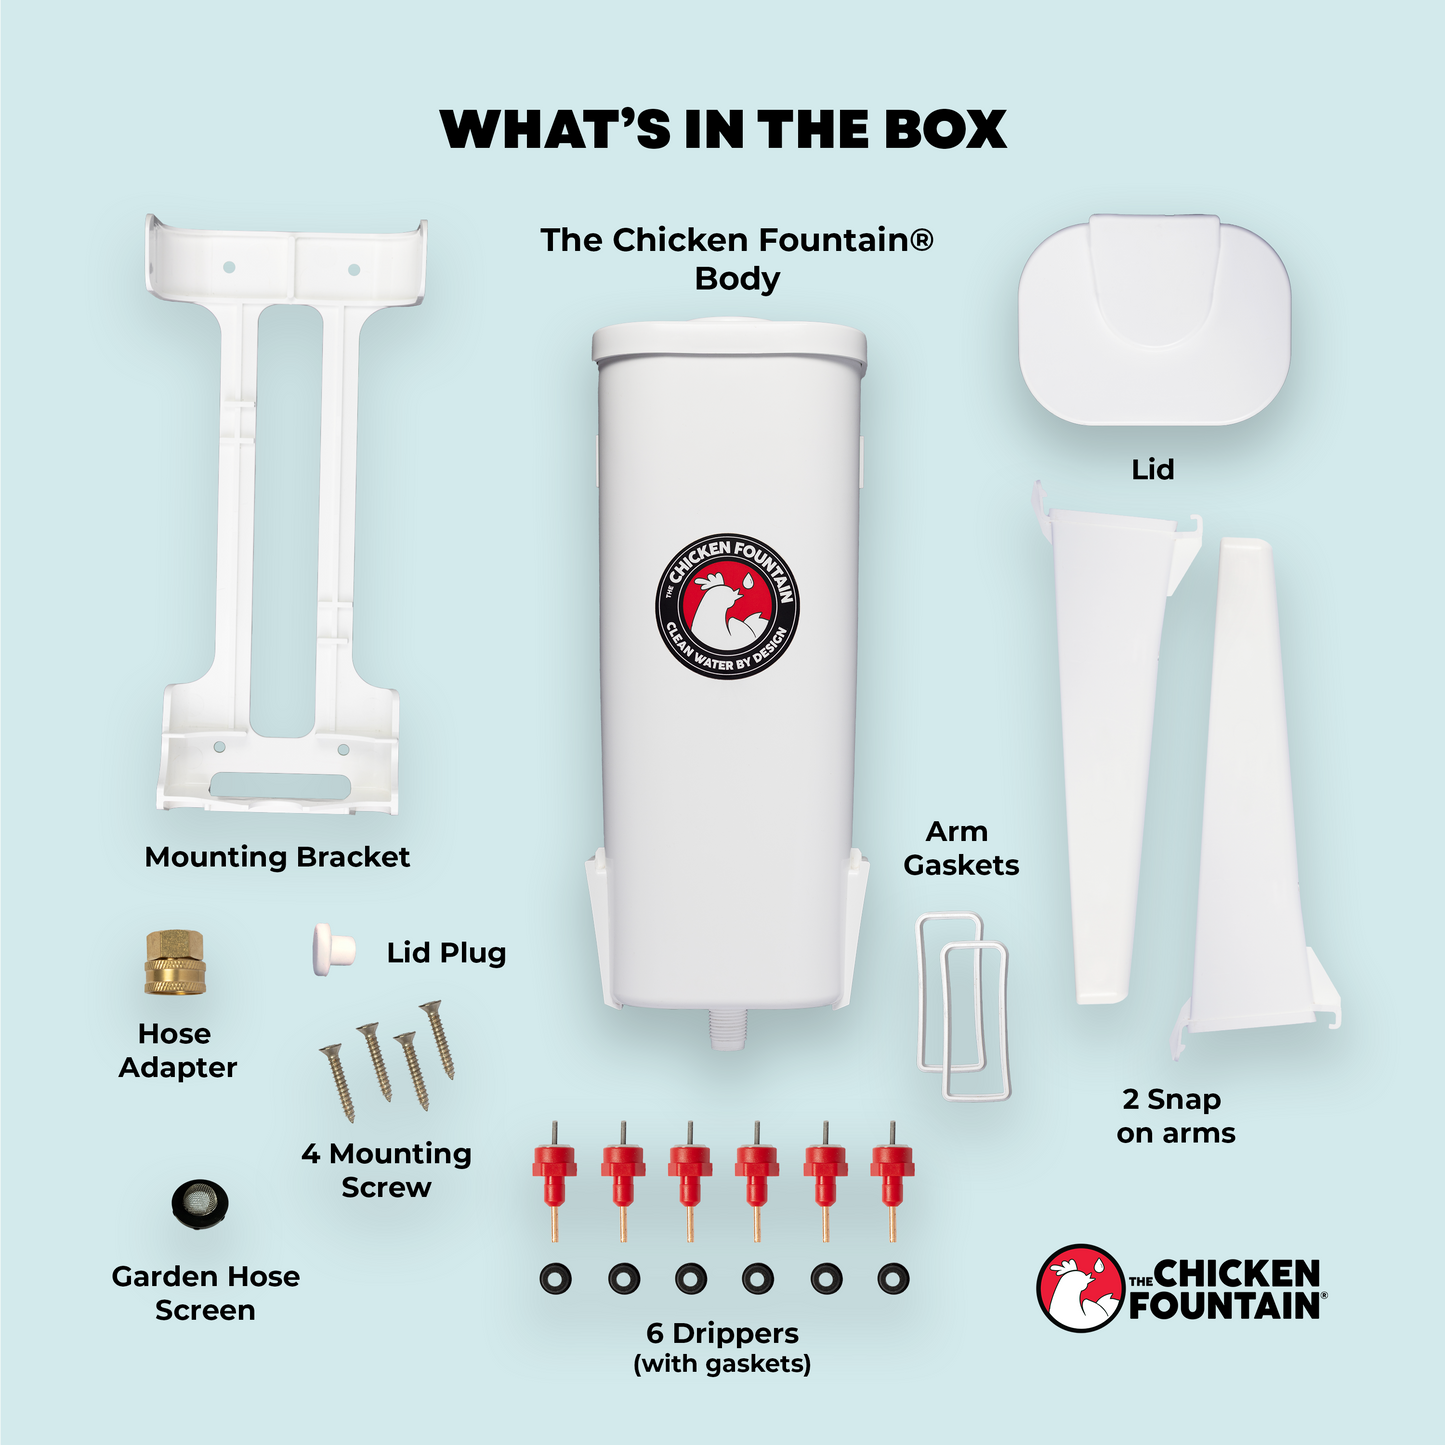
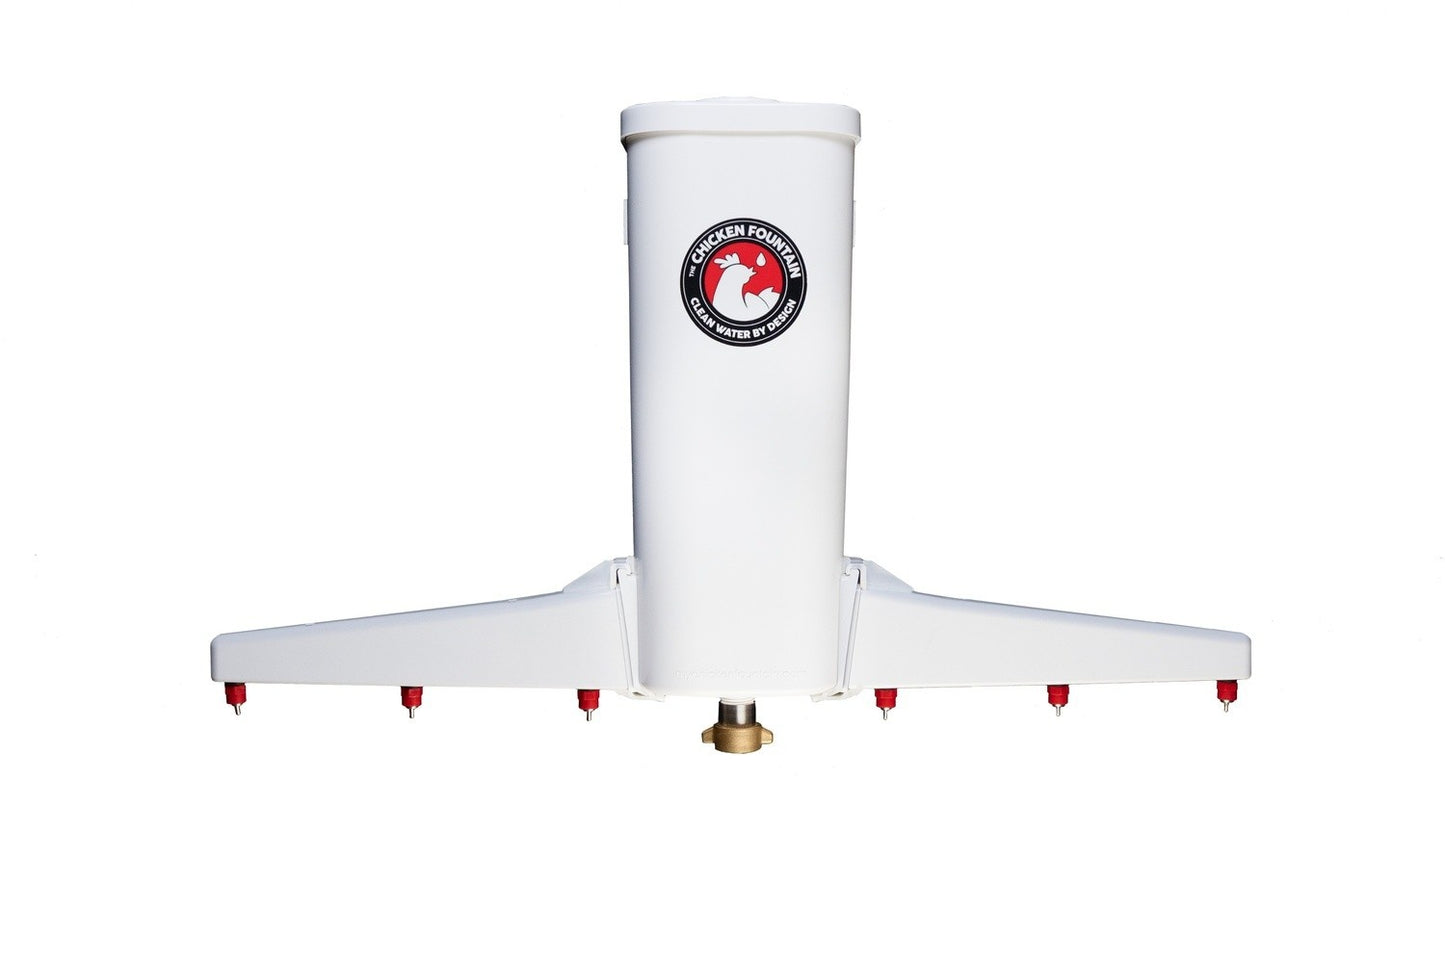
First inster the white rubber gaskets into the corresponding slots on the ends of each arm (or one arm and the end cap). The top has more rounded corners than the bottom corners, so be sure to install accordingly. Then take the small black rubber gaskets and insert them into the holes on the arms. Next push the red drippers into the holes with the black gaskets.
-
Assemble the Body
Simply snap on one or both arms. If using one arm, place the Arm Port Cap over the other arm opening. Screw on the hose adapter to the threads on the bottom of your Fountain.
No tools. No fuss. Just clean water made simple.

-

Installation
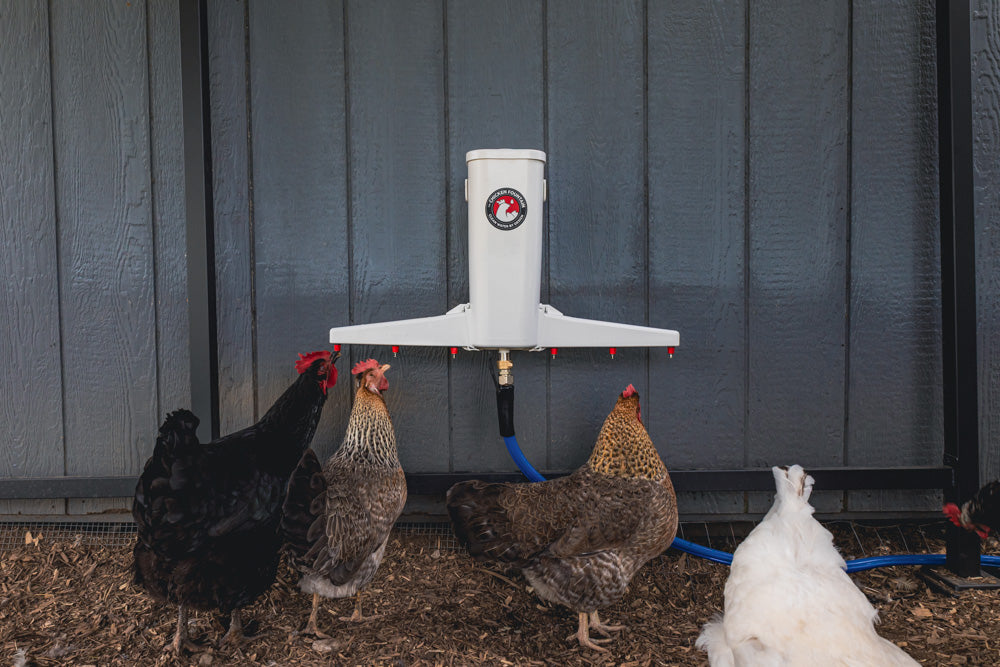
Mount the bracket on a sturdy, chicken-accessible surface with the screws included, and simply snap your Chicken Fountain™ onto the bracket. Attach a garden hose to the inlet, turn on the water!
Simple, secure, and flock-ready in minutes.
-
Training Your Flock
Try these quick tricks:
1. Rubber Band Drip – Use a rubber band to hold open a dripper and let the water drip to spark curiosity.
2. Peanut Butter Treats – Stick a few near the drippers to encourage pecking.
🎥 Need help? Watch our quick training videos to see it in action!


The chicken fountain®
The Chicken Fountain is an automatic chicken waterer that connects directly to a standard garden hose or water line to deliver clean, flowing water on demand. It replaces open bowls and buckets, eliminating daily refilling and reducing contamination from dirt, bedding, and droppings.The system uses durable, poultry-safe drinking nozzles that release water only when birds drink, helping keep water fresher and cleaner. Designed for outdoor coop environments, The Chicken Fountain is built to handle everyday use and changing weather conditions. It can be paired with winter watering setups to help reduce freezing issues during colder months.Once installed, The Chicken Fountain provides a hands-off, low-maintenance chicken coop watering system for flocks of various sizes.Built by real chicken owners who wanted to travel without worry.